How To Clean IPhone Microphone Best Way In 2023
How to Clean iPhone Microphone: A Comprehensive Guide for Crystal Clear Audio:
Maintaining a clean iPhone microphone is crucial for clear audio during calls, video chats, and voice recordings. Dust, dirt, and debris can build up over time, causing distorted sound and muffled audio.
We have prepared a comprehensive guide to help you clean your iPhone microphone safely and effectively with step-by-step instructions. These cleaning techniques suit all iPhone models, whether you own the latest version or an older one.
Understanding the iPhone Microphone
Before diving into the cleaning process, it’s essential to understand the role of the iPhone microphone. The microphone is a small yet vital component for capturing and transmitting sound during phone calls and recordings.
In most iPhone models, the microphone is at the bottom, next to the charging port. For newer models, additional microphones might be near the camera or on the back for better audio capture.
Signs of a Dirty Microphone
Are you having trouble with your iPhone’s microphone during phone calls? If you’re experiencing muffled or distorted audio or hearing background noise, it might be time to clean your microphone. This straightforward process can improve the quality of your phone calls. Follow these steps to clean your microphone:
1. Locate the microphone on your iPhone. It’s typically located near the charging port at the bottom of the phone.
2. Take a clean, dry toothbrush or a small, soft-bristled brush and gently brush the microphone. Make sure to be gentle and avoid using too much pressure.
3. If there’s any visible debris or dirt, use a dry cotton swab to remove it gently.
4. Finally, test your microphone by making a phone call and checking if the audio quality has improved.
By cleaning your microphone, you can ensure that you can communicate clearly during phone calls and avoid any frustrating audio issues.
Recommended Posts:
- How To Send Fax From iPhone Free [100% FREE]
- 9 Easy Methods How To Unlock An IPhone Without Password
Preparing for Cleaning
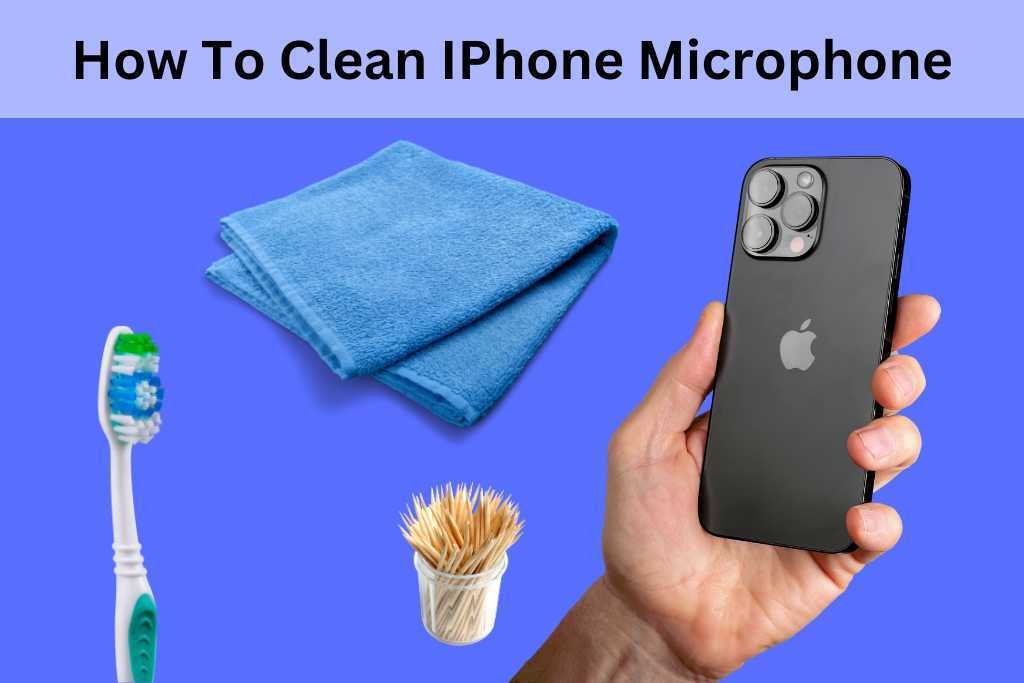
Before cleaning, gather the necessary materials: a microfiber cloth, cotton swabs, isopropyl alcohol (at least 70% concentration), and a soft brush. Ensure your iPhone is turned off to prevent any damage during cleaning.
Safe Cleaning Methods
To clean your iPhone microphone safely, follow these steps:
1. Gently wipe the exterior of your iPhone with a microfiber cloth to remove surface dust and fingerprints.
2. Dampen a cotton swab with isopropyl alcohol. Be sure to squeeze out any excess liquid to avoid dripping.
3. Carefully clean the microphone openings using the damp cotton swab. Avoid pressing too hard to prevent damage.
4. use a soft brush to dislodge and remove stubborn dirt or debris gently.
5. Allow the microphone area to dry completely before turning your iPhone back on.
Cleaning Without Liquids
When it comes to cleaning your microphone, there are a variety of methods that you can use. One option is to use liquids, such as isopropyl alcohol, to remove dirt or debris from the microphone area. However, if you would prefer not to use liquids, there are dry methods that you can try.
For example, you can use a soft brush or dry cotton swab to remove any dirt or debris gently. While this may not be as effective as using isopropyl alcohol, it offers a safer option for those worried about possible moisture damage.
Ultimately, the most important thing is to clean your microphone regularly to ensure it functions correctly and produces high-quality sound. By cleaning your microphone, you can extend its lifespan and ensure that it continues to provide you with the performance you need.
Dos and Don’ts of Microphone Cleaning
To ensure you clean your iPhone microphone without causing any damage, follow these dos and don’ts:
Dos:
– Use isopropyl alcohol with at least 70% concentration for effective cleaning.
– It’s essential to be delicate when cleaning to prevent any harm to the microphone or other parts.
– Turn off your iPhone before cleaning to prevent electrical issues.
Don’ts:
– Avoid using excessive moisture during cleaning.
– Don’t use sharp objects or compressed air to clean the microphone; it can cause irreparable damage.
Cleaning Different iPhone Models
Different iPhone models may have varying microphone placements. Here are specific tips for cleaning the microphone on other iPhone models:
1. iPhone 6, 6S, SE (1st generation): The microphone is at the bottom, next to the charging port. Follow the general cleaning steps mentioned earlier.
2. iPhone 7 and newer models: Besides the bottom microphone, more recent models have additional microphones near the camera and on the back. Be cautious while cleaning around these areas.
3. iPhone X and later models: The microphone is on the bottom edge near the speaker grille. Take extra care when cleaning this area, as it’s close to the water-resistant seal.
Maintaining a Clean Microphone
To maintain a clean iPhone microphone and prevent audio issues, incorporate these practices into your routine:
1. Regular cleaning: Schedule regular cleaning sessions for your iPhone microphone to prevent dirt buildup.
2. Protective phone case: Invest in a phone case with microphone openings to protect the microphone from external elements.
Recommended Posts:
- How To Send Fax From iPhone Free [100% FREE]
- 9 Easy Methods How To Unlock An IPhone Without Password
Troubleshooting Tips: How To Clean IPhone Microphone
If you’ve followed the cleaning steps but still experience audio problems, consider these troubleshooting tips:
1. Check for software issues: Ensure your iPhone’s software is up-to-date. Sometimes, audio issues can be resolved with a software update.
2. Contact Apple Support: If the audio problems persist, it’s best to seek professional help from Apple Support or an authorized service center.
Conclusion
A clean iPhone microphone is essential for clear audio quality during calls and recordings. By following the step-by-step guide on how to clean your iPhone microphone safely and effectively, you can maintain optimal audio performance and enhance your overall user experience.
Regular cleaning and proper maintenance will ensure that your microphone delivers crystal-clear audio for all your communication needs. Don’t hesitate to take action if you notice any audio issues, as a clean microphone can significantly impact your daily interactions.
Keep your iPhone microphone in top-notch condition, and enjoy seamless communication with your friends, family, and colleagues.
FAQ: How To Clean IPhone Microphone:
Q1: How often should I clean my iPhone microphone?
A: It’s recommended to clean your iPhone microphone every 2-3 months to prevent dirt buildup and maintain optimal audio quality.
Q2: Can I use water to clean my iPhone microphone?
A: No, it’s not advisable to use water. Instead, use isopropyl alcohol with at least 70% concentration for safe and effective cleaning.
Q3: My iPhone microphone is still not working after cleaning. What should I do?
A: If cleaning doesn’t resolve the issue, check for software updates or contact Apple Support for further assistance and troubleshooting.